best book on shading 3d drawing
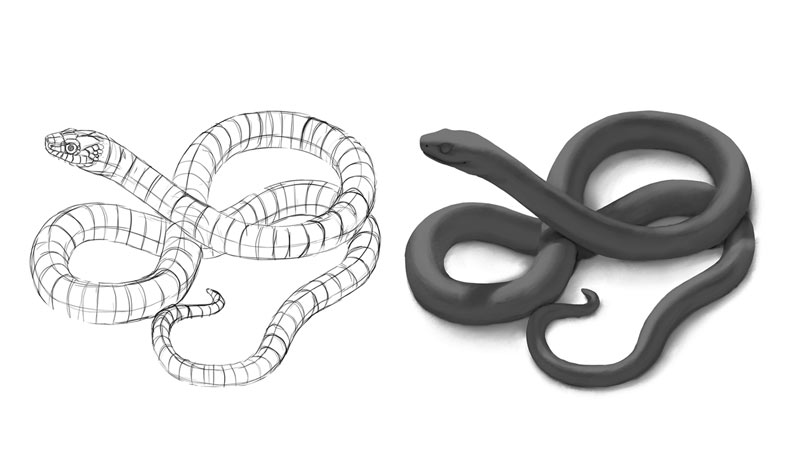
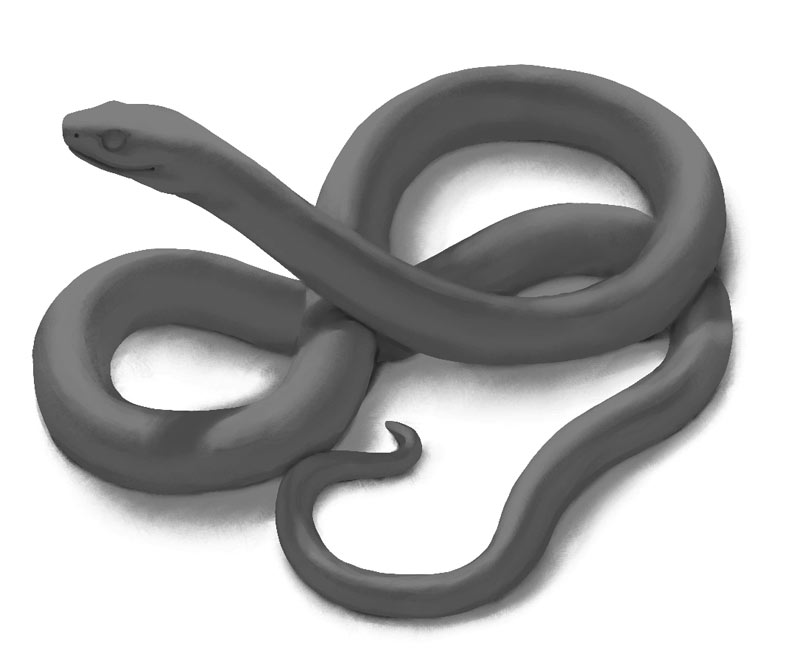
If yous want to get a digital artist, just yous don't know where to start, this serial is for you! I'll explain to you all the basics in an organized manner, without assuming any prior knowledge about the topic. In this third part I'thou going to show you how to make your objects look 3D past using various shades of gray.
- Part ane: Best Plan for Digital Cartoon
- Part 2: What Y'all Demand to Know Before You Start
In the real earth, light and shadow are all we need to see the objects around us. In art, light and shadow are translated into shading—a combination of various levels of brightness that our encephalon recognizes every bit patterns characteristic for 3D objects.
And then if you want to shade your artwork realistically, you need to learn how to create these special patterns of shading that our brains wait to see. In this article I'll show y'all how light and shadow affect 3D objects, and how to shade digital fine art using this noesis.
All the custom brushes I used in this tutorial can exist downloaded here.
The Theory of Lite and Shadow
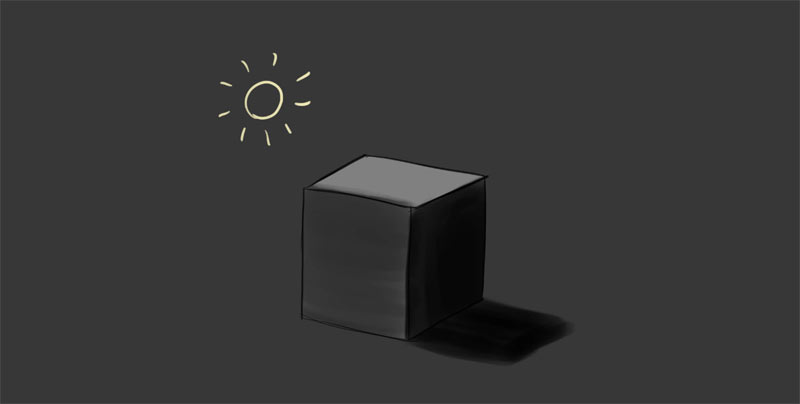
We all know, intuitively, how to shade forms similar a box. It's quite like shooting fish in a barrel to imagine that the side in front of the light source gets the nigh low-cal, and the side in the back gets none.
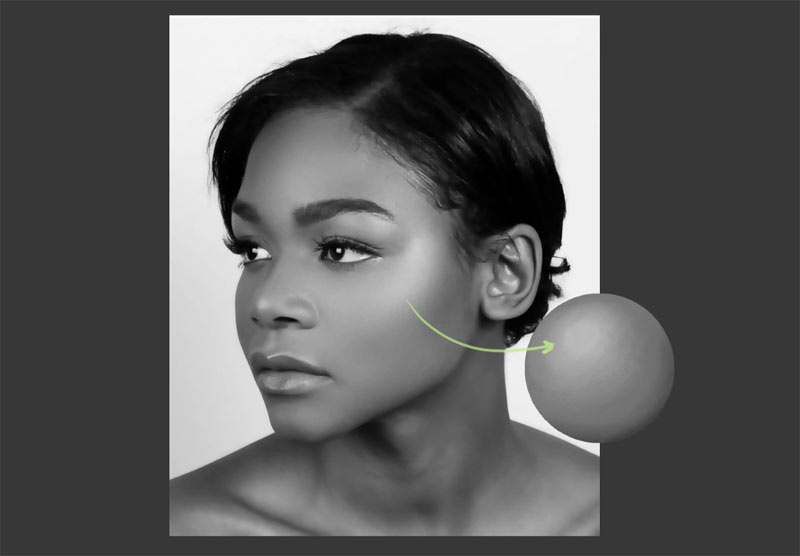
Simply in nature, objects rarely accept a articulate front or back. Just look at your ain caput—the face is in the front, merely there'south no edge between the confront and the side of the head. That'southward why it's improve to learn near light and shadow from a sphere, not a box.
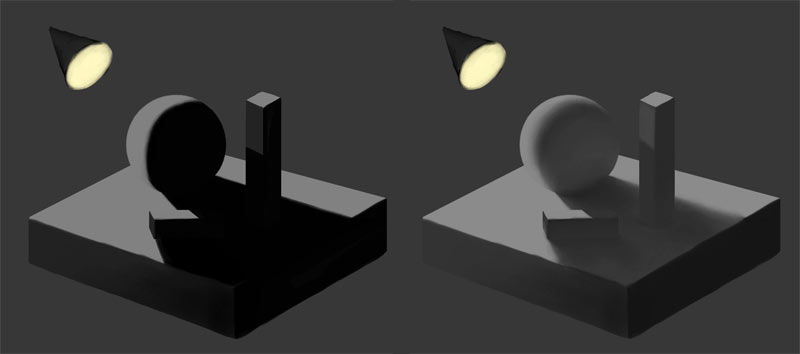
Terminator and Core Shadow
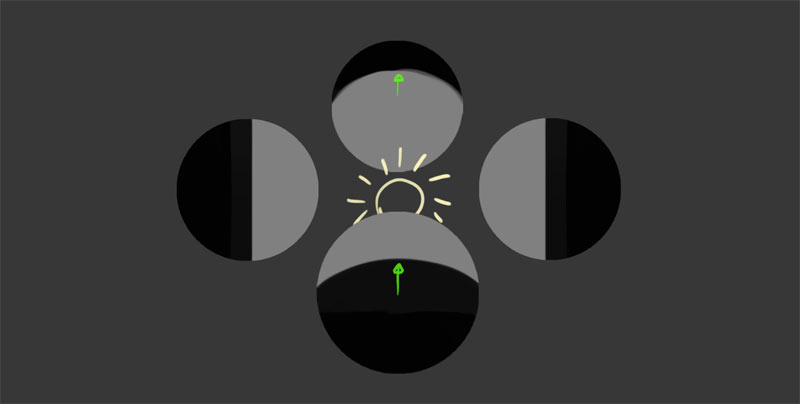
When lite hits a sphere, information technology tin can only accomplish a half of it. The border between the illuminated half and the adumbral office is called the terminator, and the nighttime area behind it is called core shadow.
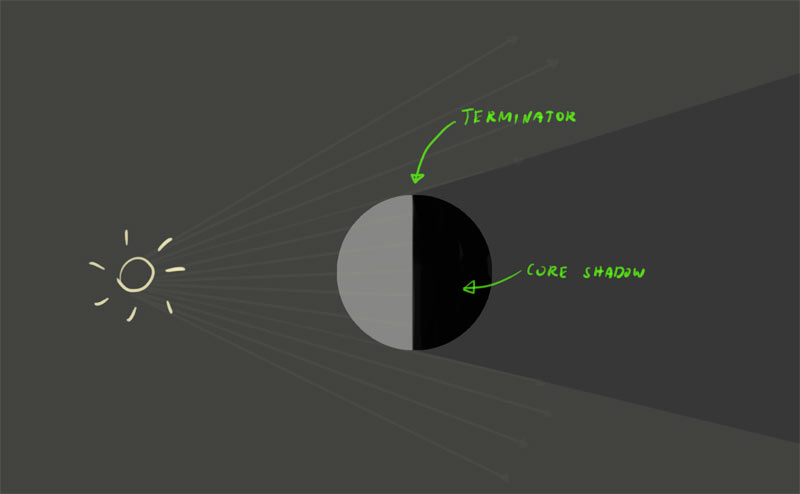
The shape of terminator on curved surfaces shows u.s. the direction of the light source—if the calorie-free source is behind the object, terminator bends towards the light, if it's in front of the object, information technology bends towards the shadow.
Calorie-free Falloff
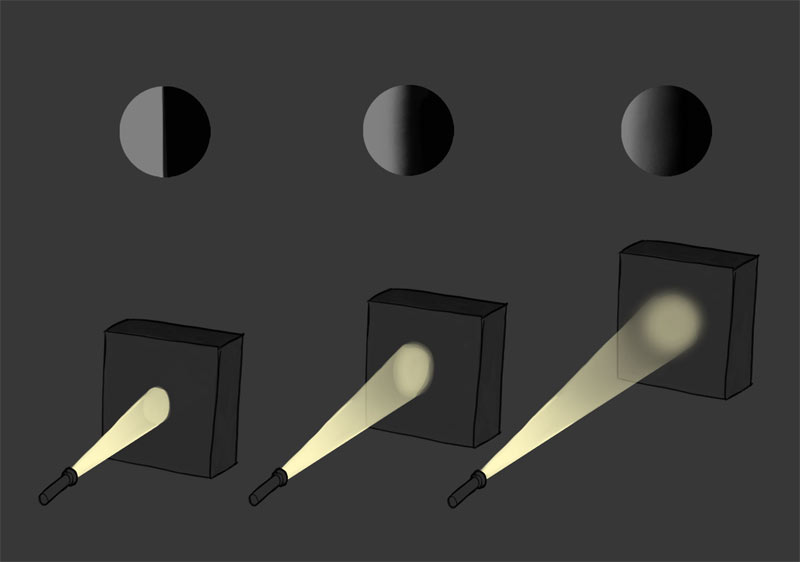
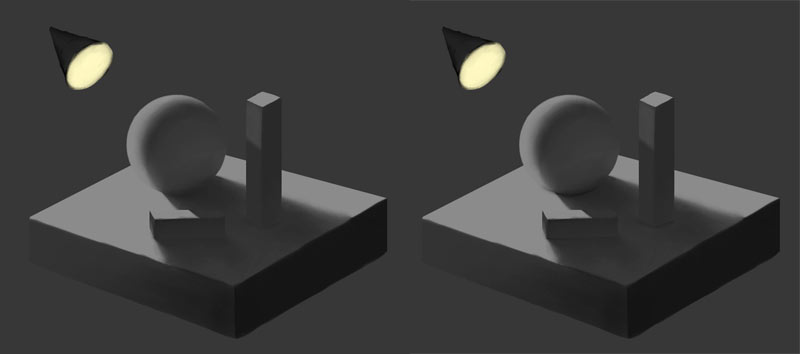
If you point your flashlight at a close surface, you can come across a circle of lite with sharp edges. If you point it at a distant wall, the edges get softer, and the calorie-free itself is dimmer. This consequence is chosen falloff—the closer the calorie-free source to the illuminated surface, the sharper the terminator. The farther it is, the softer the terminator. Soft terminator introduces areas of weak shadow to the illuminated area.
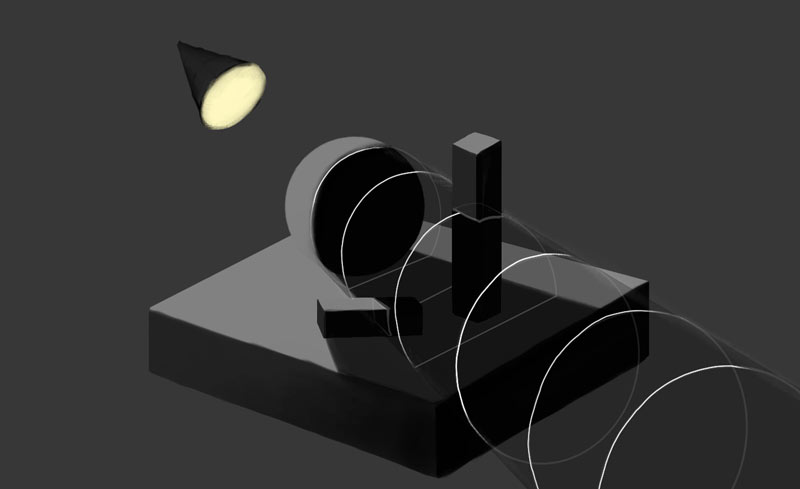
Cast Shadow
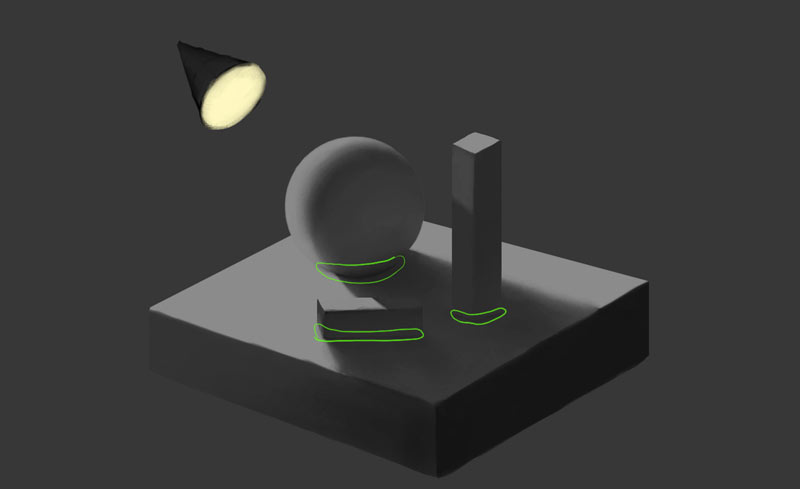
If our sphere was the only object in the globe of void, we could finish hither. But our world is full of different objects, so we need to wait at the interactions between them as well. First of all, if we put the sphere between the light source and some other object, light tin can't reach that object evenly anymore.
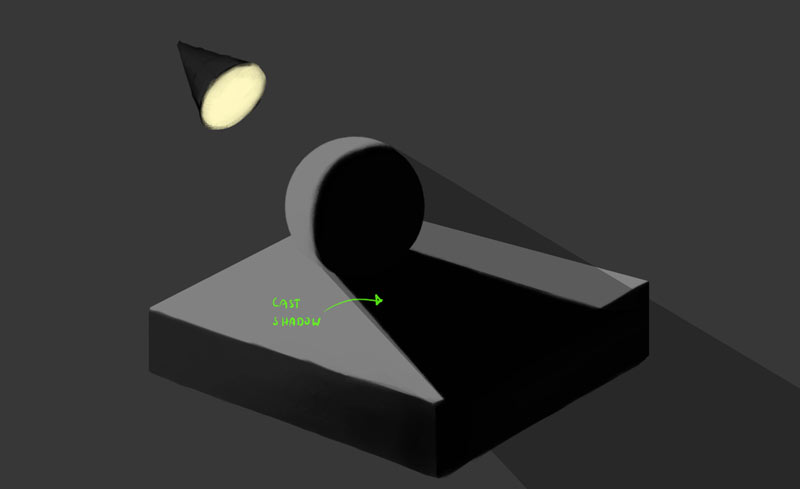
This is how a cast shadow is created—we say that the sphere casts a shadow upon the other surface. What information technology actually means is that there's an area of blocked low-cal right backside the sphere, and the other objects happens to autumn into it.
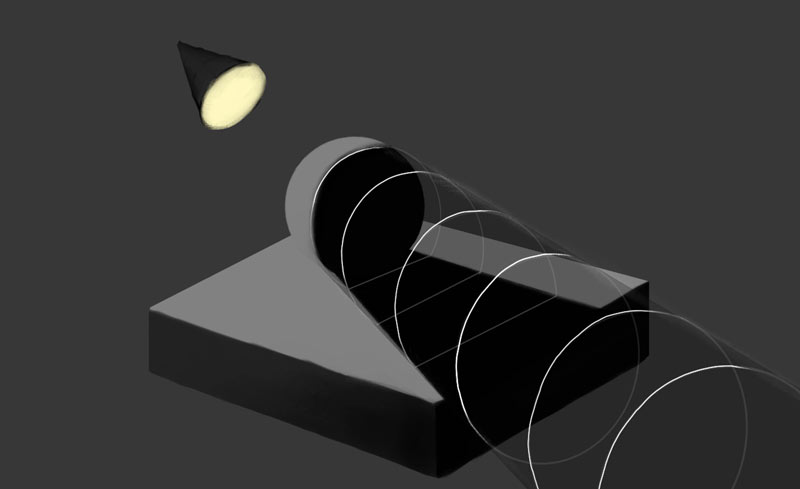
Fifty-fifty though the cast shadow is flat, the area of blocked light is not. Some other object can be inside it, or outside it, or partially inside it—and the borders of this adumbral area will draw a new, separate terminator on that other object. Thinking of a cast shadow equally of a 3D surface area actually helps imagine the shape of this terminator.
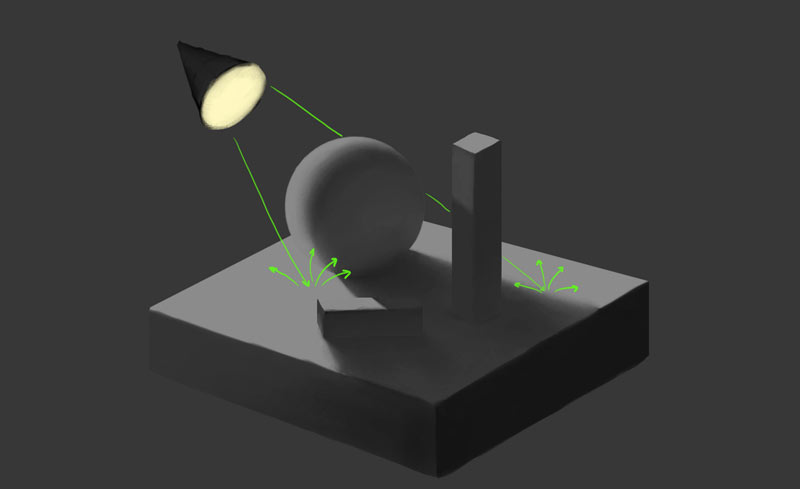
Reflected Light
If you think of it, the shadows are rarely fully black. You tin more often than not encounter what's inside them, which means at that place must be some light at that place. Where does it come from, if this area is blocked from the low-cal source? You probably guessed it—it'due south reflected light.
Objects reverberate light—that's the reason why we tin can see them. Merely not all light gets reflected directly into our eyes. Near of it gets reflected somewhere else. And simply like the rain drops can hit your ankles fifty-fifty if you lot put an umbrella between your body and the heaven, the lite can bounce from some other object and autumn into the shadow.
This bounced low-cal is obviously weaker, because it gets absorbed past every surface it hit along the way, only it'due south nonetheless light—so it brightens the shadow. The ameliorate access information technology has to the shadowed surface, the stronger the brightening effect.
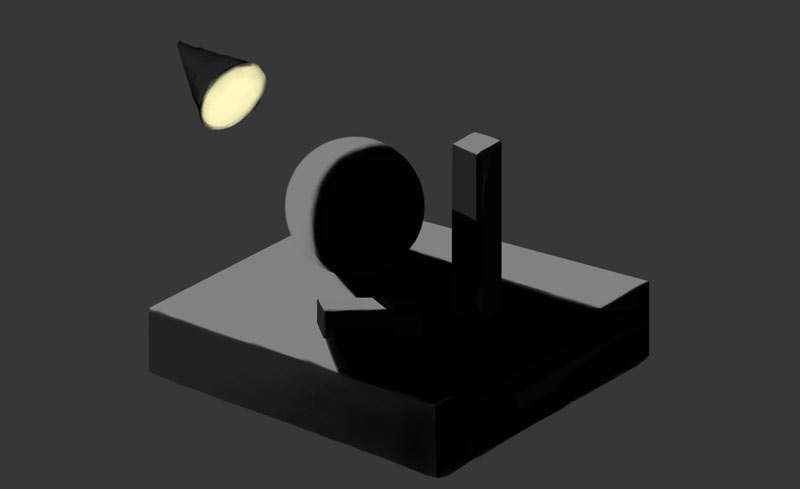
Contact Shadow/Occlusion Shadow
Just at that place are some areas where even the reflected light can't reach—for instance, when two objects touch each other, creating a tiny expanse of shadow. This shadow is called a contact shadow or an apoplexy shadow. Because it's so hard to accomplish, information technology'south darker than any other shadow in the scene.
How to Shade Digital Drawing
Pace 1: Sketch and Clipping Mask
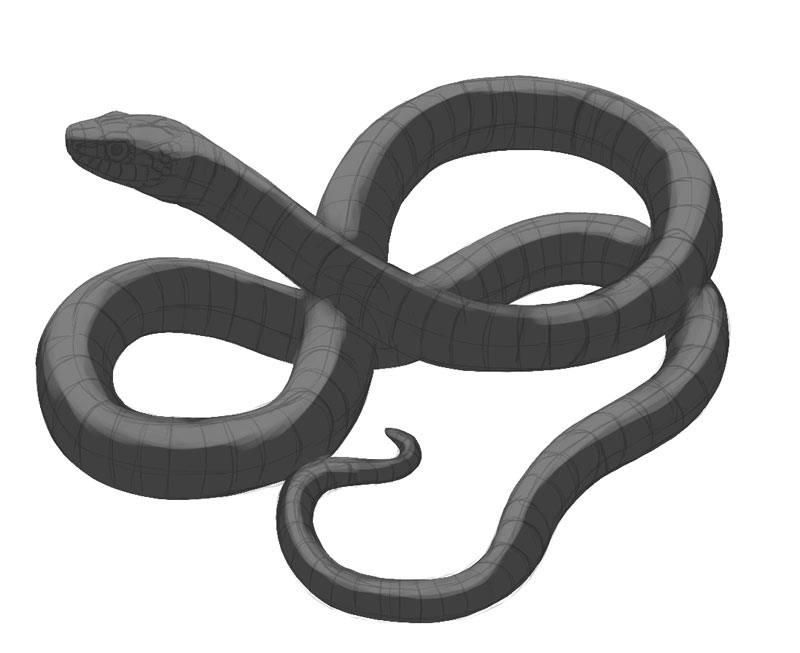
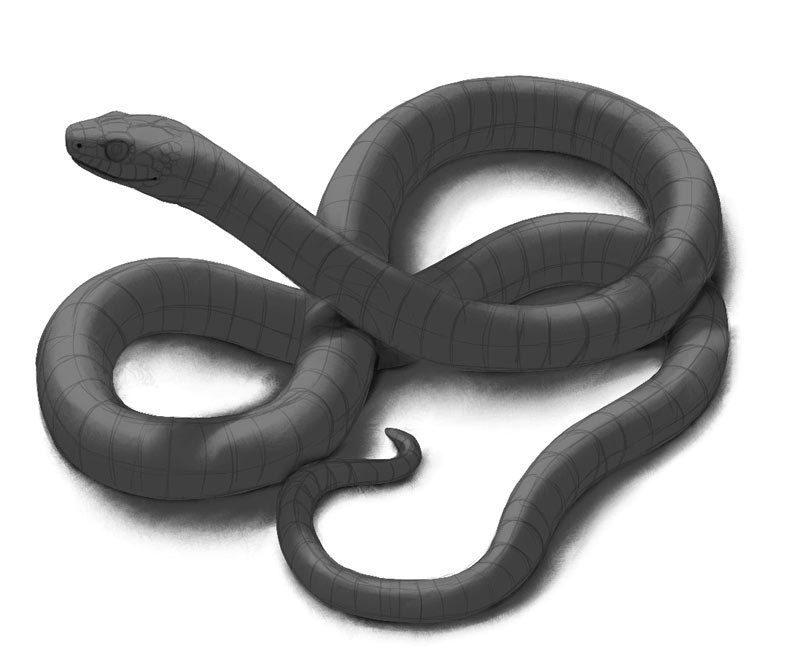
That was the theory, time for some practice! Open a sketch or download mine to to follow the process. The sketch should testify the form of the object clearly—nosotros don't want to guess! First, lower its Opacity.
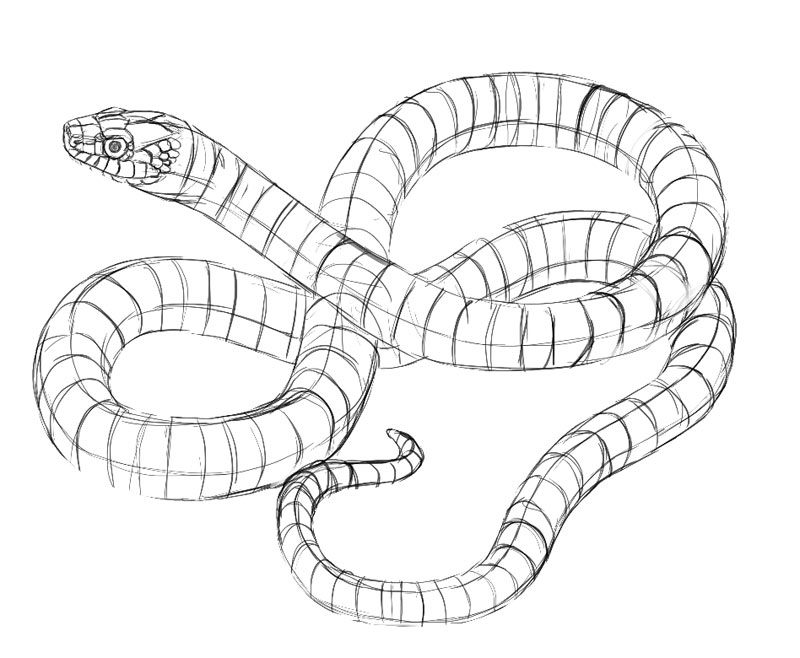

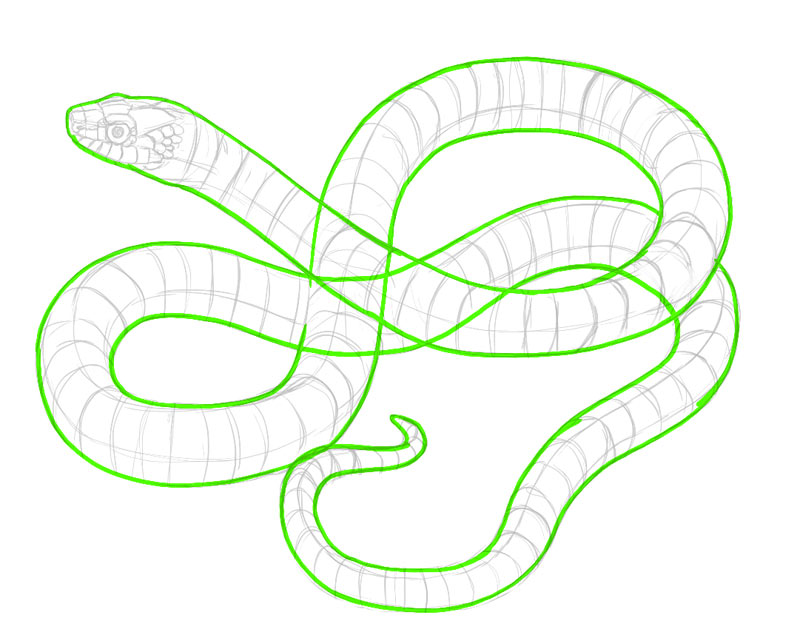
Create a new Layer under information technology. Use a hard brush, like the Inking Pen, to depict the outline of the object.
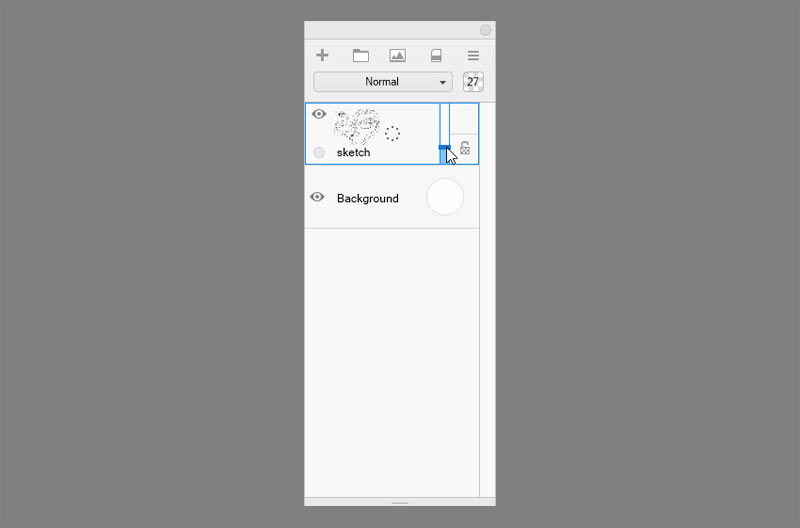
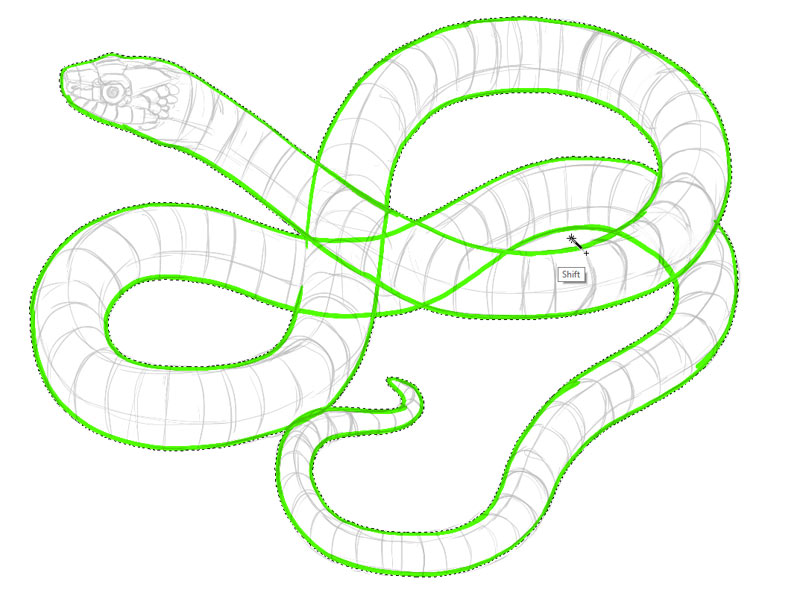
Printing W to use the Magic Wand tool. Click in the area or areas outside of the outline. And then click Capsize. Create a new Layer and fill it with 50% gray. This will exist the basic color of the object. You lot tin replace it with any other color later.


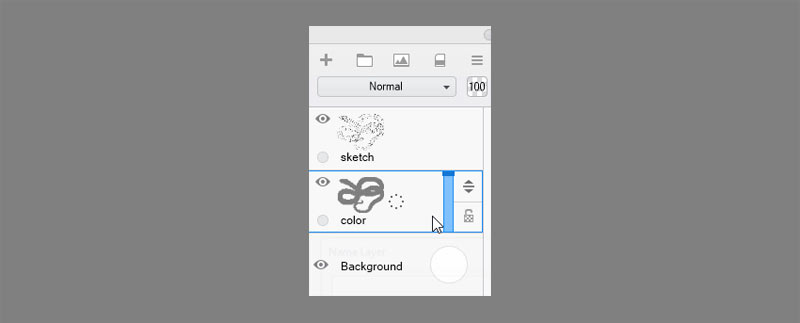
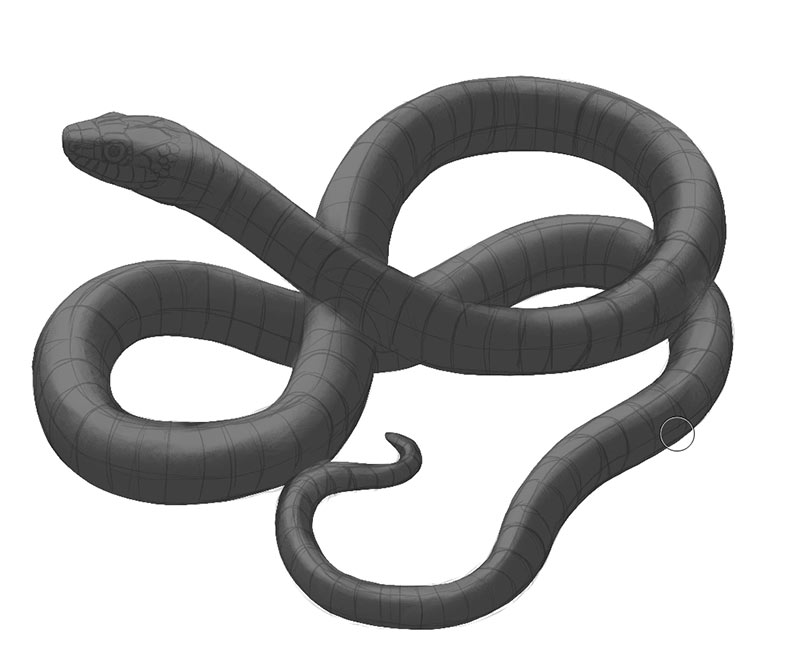
Step two: Core Shadow
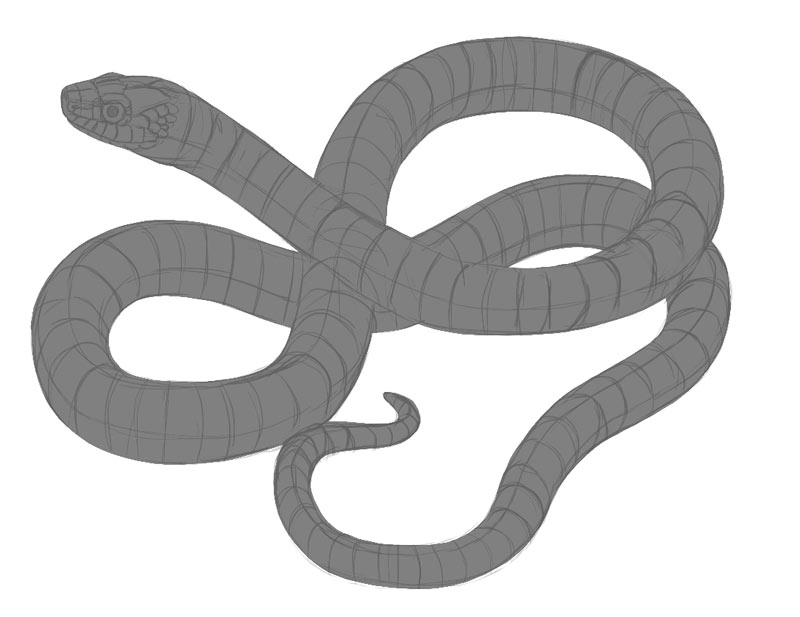
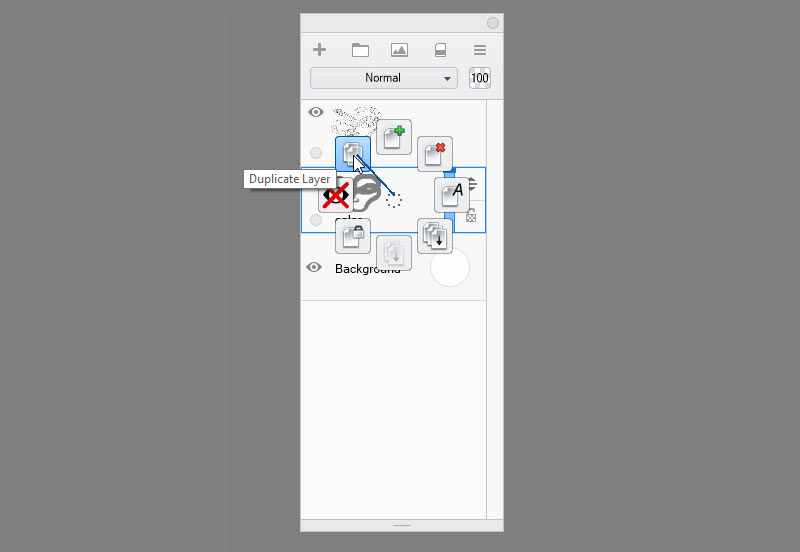
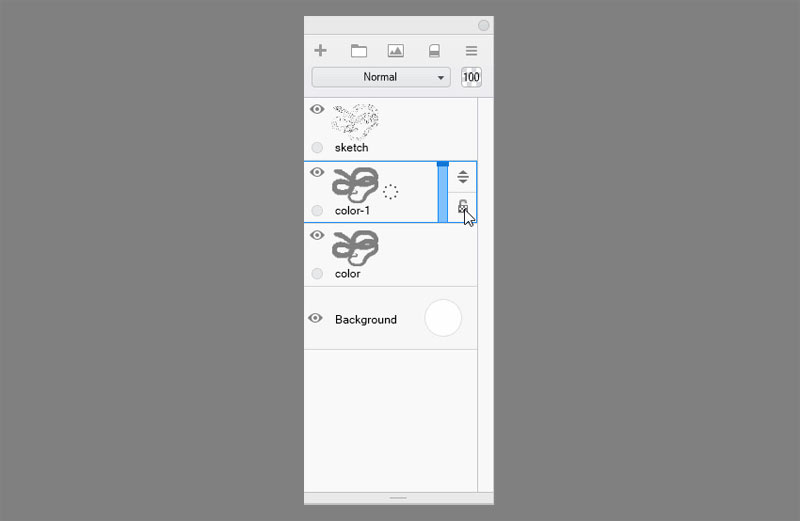
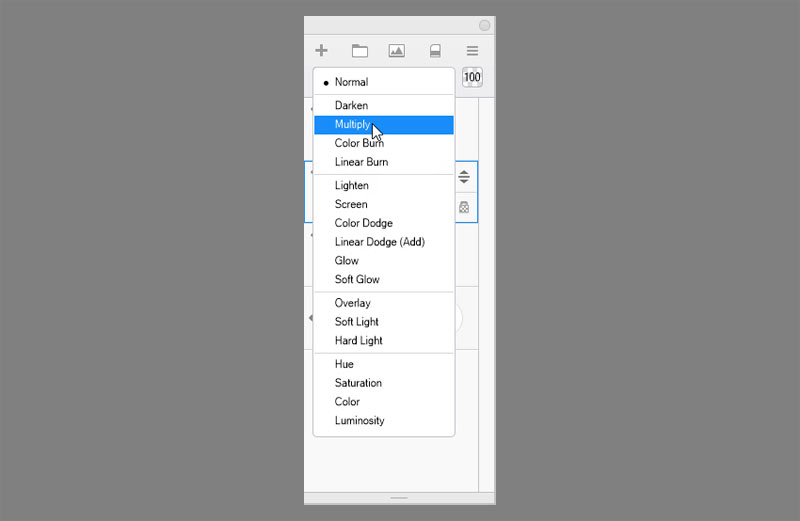
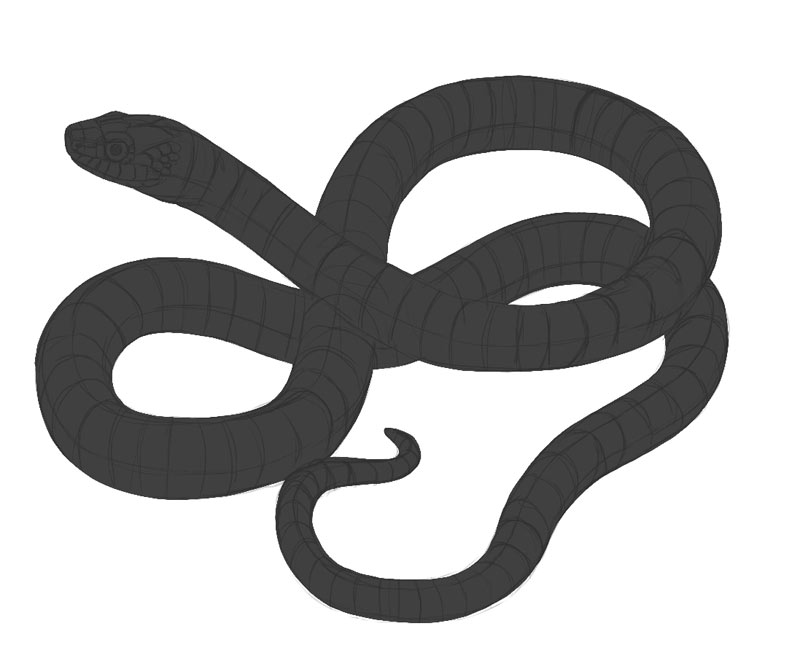
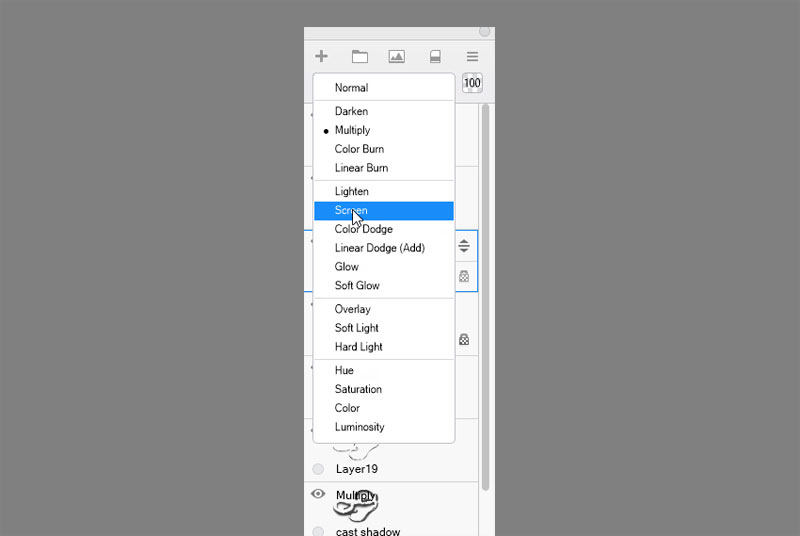
Duplicate the layer. Lock its transparency and modify the Blend Mode to Multiply. If you lot hide and show the layer a couple of times, you'll see how nosotros darkened the whole object with a shadow. This will be our cadre shadow.
Pace iii: Terminator
Now we need to decide the location of the light course and its type. We don't need to practice any calculations or measurements. But start painting with white over the area that you need illuminated, then follow the same management of the light on the residuum. Remember—the ultimate goal of this process is to make the artwork look good. If it looks and feels proficient to you, it doesn't matter if it'southward correct or non. Nobody is going to check this!
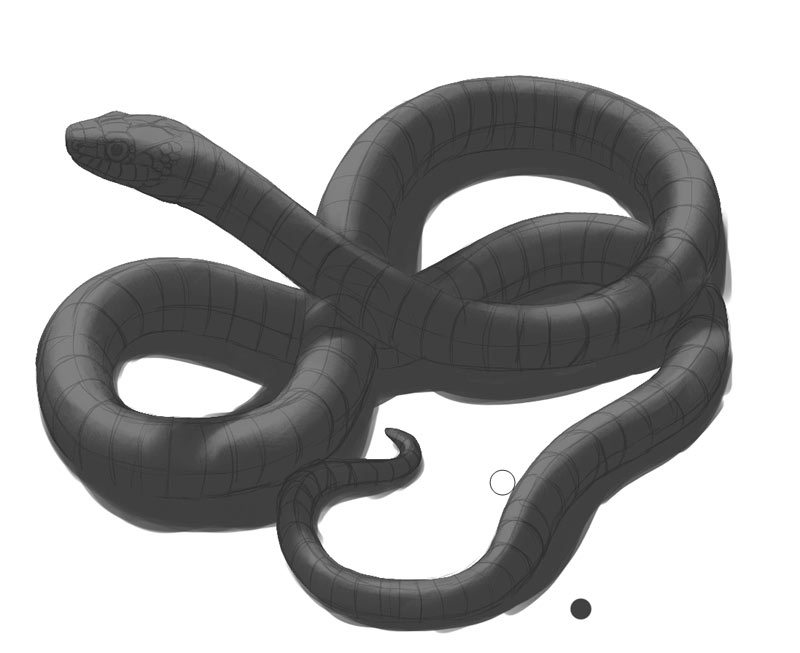
Pace 4: Light Falloff
You can run into my terminator looks pretty sloppy, merely that's the point—information technology'due south just a sketch of the shadow, ready to be rendered further. What kind of falloff would look best here, what practice you recall? Sharp terminator makes a not bad effect, but I think the soft one is more natural. So I took a blending castor and dragged some of the shadow into the illuminated area—but non the other way around! If you prefer a abrupt terminator, you lot should now clean the line and blend it just a piffling.
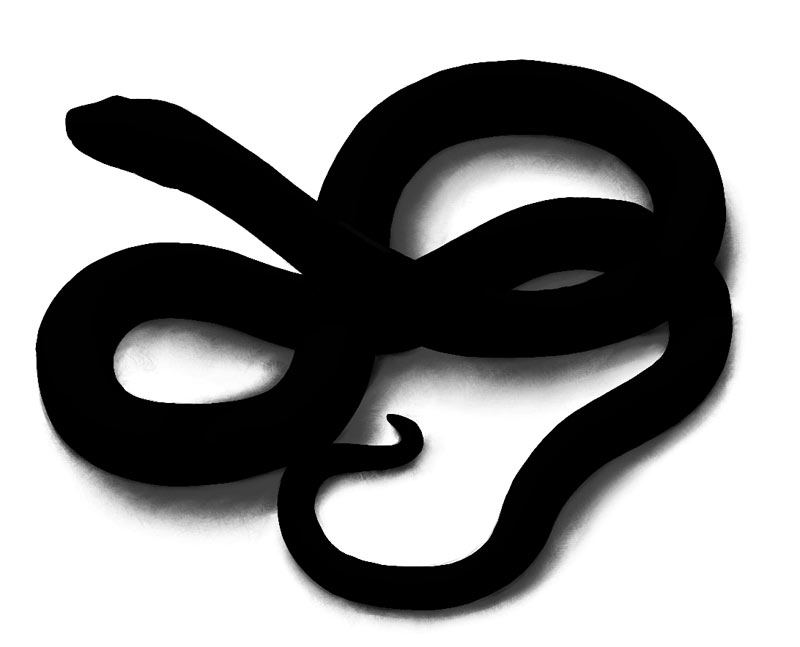
Step v: Cast Shadow
Time for the bandage shadow. First, try to detect if in that location are any overlapping areas in your object. If so, draw the cast shadow over them, wrapping it around the grade of the object. Employ fifty% grey.

Permit's draw the cast shadow on the ground as well. Create a new Layer nether the others and set its Blend Way to Multiply. Paint the shadow next to the shadow on the object, roughly copying its shape and size. It's direction should be defined by the direction of the imaginary light source—the same that you used while painting the illuminated areas.
The bandage shadow should be every bit sharp or equally soft as the terminator on its object. Considering I used a very soft terminator, I blended the shadow very strongly also. The farther the edge is from the object, the softer it should be, relatively to the general level of softness.
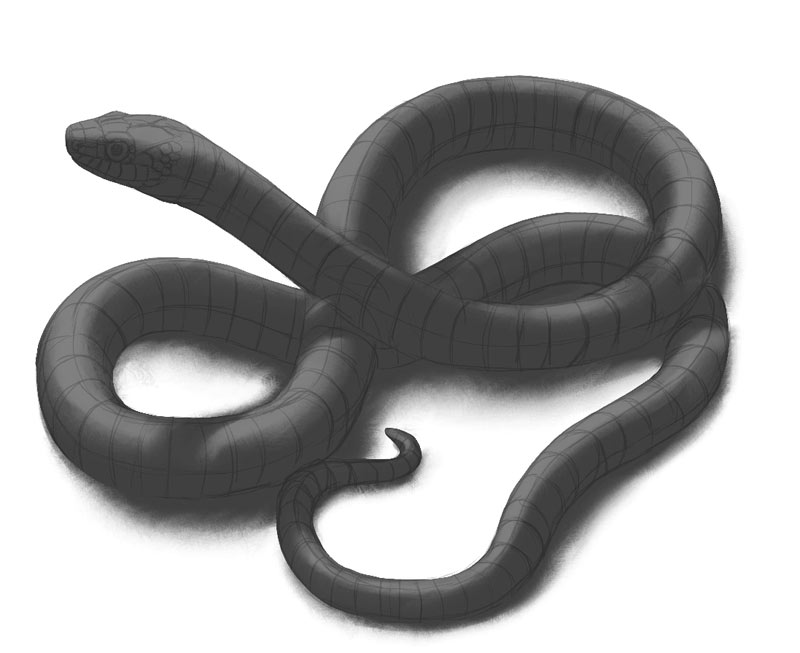
Step 6: Contact Shadow
Allow's add the contact shadow at present. We tin can do it by using darker gray and painting it closer to the body. It applies to both the bandage shadow and the core shadow. It's best to keep it on a separate layer, so that you can control the effulgence of the core shadow without affecting the contact shadow.
Step 7: Reflected Lite
At this point the object should look pretty 3D even without the line art. But we tin can arrive more realistic however. Duplicate the cadre shadow layer and paint over it with black. Change its Blend Mode to Screen. Now accept dark gray and paint over the shadowed expanse. Just stay abroad from the terminator and the contact shadow.
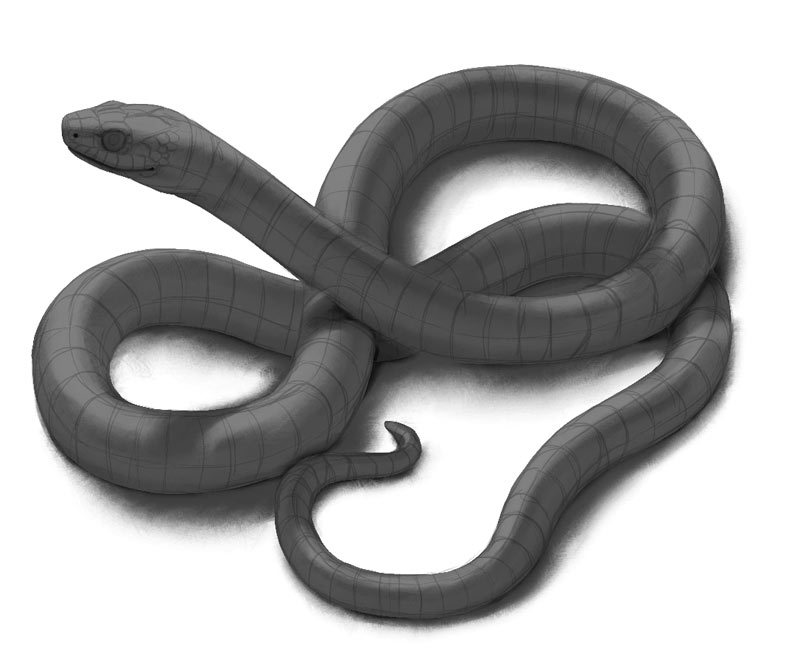
Footstep 8: Final Adjustments
Finally, you tin can adjust the brightness of the shadows by lowering the Opacity. Making the core shadow brighter will add a realistic effect of ambient low-cal. You tin besides use Opacity to make the reflected calorie-free properly darker than the illuminated area.
That'southward All… For At present!
This time, for simplicity'due south sake, we used a smooth, matte, gray material only. Merely the world around us is total of colors and textures! In the last part of this series we're going to learn everything virtually them, simply in the meantime you should do shading on its own. Become a main of grayscale, and so you'll exist ready to become to the next level!
You may besides want to have a wait at my older tutorials on this subject, published on Envato Tuts+:
- Improve Your Artwork past Learning to Run across Light and Shadow
- The Secret to Realistic Painting: How to Master Value
- Colour Fundamentals: Shading
Source: https://monikazagrobelna.com/2019/10/21/digital-drawing-for-beginners-basics-of-digital-shading/
0 Response to "best book on shading 3d drawing"
Post a Comment